Passwords have long been the weak link in securing online accounts, vulnerable to phishing, brute force attacks, and data breaches. Enter passwordless authentication—a modern solution powered by the Web Authentication (WebAuthn) API and public key cryptography. Supported by the FIDO Alliance, this approach eliminates shared secrets like passwords and replaces them with passkeys: cryptographic credentials securely stored on devices.
Using strong authenticators such as platform authenticators, security keys, or biometric features like Touch ID, passkeys offer both robust security and seamless usability. By ensuring private keys never leave the user’s device, this method not only resists phishing attacks but also streamlines the authentication flow for a better user experience.
In this article, we explore how passkeys and the WebAuthn protocol work together to revolutionize authentication for apps and websites. Additionally, we provide a hands-on guide to implementing passkeys using JavaScript and PHP. Whether you’re a developer building passwordless authentication flows or enhancing existing systems, this hands-on approach will help you get started with ease.
Background
Think of how many websites out there that you’ve created an account for. Likely more than the number of unique passwords you can memorize and maintain. Many of us have deferred to password managers that are now built into web browsers or standalone services to keep track of them all. While you may be confident that you’ve created a strong password for a website, there’s no way to know how that website stores your password on their end. Sites have been compromised and passwords leaked and with passwords being reused, that leak can lead to further damage on other sites that use the same password. Two form authentication has sprung up to help, but even that has its flaws, like if someone was able to redirect your phone number and is inconvenient sometimes for the end user (let me go get my phone in the other room).
Those are the challenges as an end user, but you’re a web developer who’s tasked with making sure your web application is secure and convenient for your end users. It can be daunting to implement a user authentication system for your website with the necessary features to handle forgotten passwords, two form authentication, and more. Surely, there’s a more efficient solution! This is where the WebAuthn protocol and passkeys come into play. WebAuthn currently has a 98% reach for global web browsers, so it’s a great time to implement as you can be assured of your work’s support.
This article aims to give you a high level understanding of how this system works and how you can implement it for your web application, avoiding some of the more technical details. After we’re done, you should be able to implement a rough user account creation and login to get used to how it works and then be able to dive deeper for any more specific use case scenarios.
IPC NEWSLETTER
All news about PHP and web development
The 30,000 Foot View
Let’s start with a super high level overview. For the applications I’ve developed, I use a PHP framework (CodeIgniter) with JavaScript code on the client side. When someone wants to create an account, they provide a username (ideally an email address), which gets sent to the PHP backend to create a credential creation request. The backend replies and its response is used to create the credentials, which the browser and user’s device handle. You would then send the credentials back to the PHP backend to verify and save in the database. Later, when it’s time to log in, they could simply click a login (with Passkey) button. This will send the request to the PHP backend to prepare the request and then its response is used to request credentials associated with the website from the browser and user’s device. Once the user completes that process, the response is sent back to the PHP backend for verification and if successful, logging in.
Depending on the user’s ecosystem (i.e. Apple, Google, Microsoft, etc), created credentials are securely saved on that device and synchronized with the user’s system account. So for example, if the user was using Safari on an iMac to create the account, the credentials are saved in Apple’s Passwords application and synchronized with the user’s iCloud account. This ensures the credentials are available to the user regardless of what device they are using. So if your user goes home and uses their iPad to access your web application, they would be able to simply log in with the credentials they created earlier on the iMac.
Creating the Passkey
Let’s dive into the details. On the backend, I like to use the lbuchs/WebAuthn library found on GitHub. It simplifies and packages a lot of the processes.
The first part of the implementation is when a user wants to create an account for your site. On our site, we create a guest user account for any new anonymous session and associate its ID # with that session. Then whenever the user wants to mark an item as a favorite, add something to a shopping cart, create an account, or some other action, we have a “user” already registered. When the user wants to create an account with a passkey, we can then use that ID # to store into the credential for easier retrieval later. If your application doesn’t already have user accounts set up, you could just create a GUID associated with the username/email address and then later when you create the user record, use that GUID. Just keep in mind that if you’re storing things in a relational database that users could have multiple passkeys; the ideal setup for that setup is to have a user table and a passkey table with a user_id foreign key in the passkey table to tie back to the user.
When the user fills out their username and submits the create account form, we first send a challenge request to the server with their username. I use an underlying Javascript fetch call to send that request to the server and the server uses the WebAuthn library to create the challenge and save it to the session and send it back to the client, who will use it to generate the credential in the browser.
The Javascript looks something like this:
   let userEmail = document.getElementById('email').value;
   let form_data = new FormData();
   form_data.append('email', userEmail);
   let response = await fetch('/backend-signup-pre.php', {
     method: 'POST',
     body: form_data
   });
   let data = await response.json();
This sends the POST request to the backend-signup-pre.php script which looks something like this:
   /**
    * Simple backend for the web application.
    */
   require_once __DIR__ . '/../vendor/autoload.php';
   use lbuchs\WebAuthn\WebAuthn;
   $domain = "lndo.site";
   $webauthn = new WebAuthn("Simple Passkey App", $domain);
   $email = $_POST['email'];
   $_SESSION['unique_id'] = bin2hex(random_bytes(32));
   $response = $webauthn->getCreateArgs(\hex2bin($_SESSION['unique_id']), $email, $email);
   $_SESSION['challenge'] = ($webauthn->getChallenge())->getBinaryString();
   echo json_encode($response);
The WebAuthn constructor takes two arguments, the name and the domain of your application. These will be baked into the credential to display to the user and restrict what sites it can be applied to. Your domain can be as specific as you’d like, where you could use the TLD to have it work across any subdomains, or have it subdomain specific.
You can see that this code creates a unique_id. If you have the user ID, then this is where you’d use it instead. This also gets baked into the credential, so you want to make it unique to the user and later when the user is logging in and you’re given this unique ID, you’ll be able to find the associated user.
Next you call getCreateArgs with the information you have. A lot of options you can be used to scope the created credential, but I’m just using the defaults here. You will want to store the generated challenge in the session and then return the response to the browser.
A lot of the underlying data is in binary, so it’s helpful to have support methods to convert data back and forth. You see the bin2hex and hex2bin calls in the PHP example above. On the Javascript side, I found these helper functions to convert array buffers to base64 and back.
   // Helper functions.
   var helper = {
     // array buffer to base64
     atb: b => {
       let u = new Uint8Array(b), s = "";
       for (let i = 0; i < u.byteLength; i++) { s += String.fromCharCode(u[i]); }
       return btoa(s);
     },
     // base64 to array buffer
     bta: o => {
       let pre = "=?BINARY?B?", suf = "?=";
       for (let k in o) {
         if (typeof o[k] == "string") {
           let s = o[k];
           if (s.substring(0, pre.length) == pre && s.substring(s.length - suf.length) == suf) {
             let b = window.atob(s.substring(pre.length, s.length - suf.length)),
               u = new Uint8Array(b.length);
             for (let i = 0; i < b.length; i++) { u[i] = b.charCodeAt(i); }
             o[k] = u.buffer;
           }
         } else { helper.bta(o[k]); }
       }
     }
   };
Picking back up on the Javascript client side, we want to use the helper.bta function to convert the credential request from the server to what the WebAuthn API needs:
   let data = await response.json();
   helper.bta(data);
   let credential = await navigator.credentials.create(data);
This will trigger a request in the user’s browser that looks something like this (Firefox on Mac):

If the user clicks Continue, the OS creates a public and private key pair and provides the credential information back to the browser, which you then pass onto the server to store and associate with the user. The Javascript code looks something like this:
   try {
     let credential = await navigator.credentials.create(data);
     let credential_data = {
       client: credential.response.clientDataJSON ? helper.atb(credential.response.clientDataJSON) : null,
       attest: credential.response.attestationObject ? helper.atb(credential.response.attestationObject) : null
     };
     form_data.append('credential', JSON.stringify(credential_data));
     let response = await fetch('/backend-signup.php', {
       method: 'POST',
       body: form_data
     });
   }
   catch (e) {
     // This is when the user cancels the registration or if the registration fails.
   }
The credential_data object is created with the necessary information from the credential and using the atb helper method to convert the array buffer to a base64-encoded string. Then it’s JSON-encoded and passed onto the server. Now when the server gets it, there’s a lot (19!) of verification steps in the official specification and the PHP WebAuthn library takes care of that for you, throwing its own WebAuthnException if anything fails.
   try {
     $credential = $webauthn->processCreate(
       $client_data,
       $attestation_data,
       $_SESSION['challenge']
     );
     // If you got here, the passkey was created successfully and is valid.
     // Let's create the user account.
     $user_id = create_user($_SESSION['email']);
     // Let's create the passkey.
     $nickname = $_SERVER['HTTP_USER_AGENT'] . ' - ' . $_SESSION['email'];
     $passkey = create_passkey($user_id, $credential, $nickname);
     // Let's clean up the session.
     session_unset();
     // Let's save the user id to the session, logging them in.
     $_SESSION['user_id'] = $user_id;
     session_write_close();
     // Let's inform the client that the passkey was created successfully.
     echo json_encode(['success' => 'Passkey created successfully']);
   }
   catch (WebAuthnException $e) {
     echo json_encode(['error' => $e->getMessage()]);
     exit;
   }
Remember in this use case, the user is signing up for the website and creating a passkey at the same time. So we create the user and then use its user ID # to create the passkey and store it in the session. If you already have the user ID # (say it’s a known user who wants to add a passkey to their account), then you skip that step. The passkey table uses this schema:
   CREATE TABLE `passkey` (
     `id` mediumint(8) unsigned NOT NULL AUTO_INCREMENT,
     `user_id` mediumint(8) unsigned NOT NULL,
     `unique_id` varchar(16) NOT NULL DEFAULT '',
     `nickname` varchar(255) NOT NULL DEFAULT '',
     `credential_id` varchar(100) NOT NULL,
     `public_key` varchar(255) NOT NULL,
     `created_at` bigint(20) unsigned NOT NULL,
     `modified_at` bigint(20) unsigned NOT NULL,
     PRIMARY KEY (`id`)
   );
The user_id comes from the inserted (or passed along) user ID #. The unique_id comes from the backend-signup-pre script, which creates a random hex code and saves it to the session as well as putting it into the credential request. Later on, when the user is logging in with their passkey, you’ll be able to retrieve this unique_id and use it to query the passkey table to find the matching passkey and use it to verify the request and log in the associated user. The nickname is used to provide a user-friendly label for the passkey, with their User Agent information as well as the email address they specified. The crendential_id and public_key come from the returned object from the processCreate call. This is an example of what a record looks like in the table:
mysql> select * from passkey \G
*************************** 1. row ***************************
        id: 1
   user_id: 2
unique_id: bae1434f279f6d4d
  nickname: Mozilla/5.0 (Macintosh; Intel Mac OS X 10.15; rv:133.0) Gecko/20100101 Firefox/133.0 - [email protected]
credential_id: 060a5f046bcbd1b9170b2187728cfacc4a5d26c5
   public_key: -----BEGIN PUBLIC KEY-----
MFkwEwYHKoZIzj0CAQYIKoZIzj0DAQcDQgAEw3zwXXCIKWMzqNIlbx1L/iO134Uy
9CyrdjfVGK1f7+ktqCxlwaQwaEyTJTIpi60qpsIghFOXGV/k5HcjWLX7eA==
-----END PUBLIC KEY-----
   created_at: 1734127652
  modified_at: 1734127652
1 row in set (0.00 sec)
So now you can associate the web session with the user ID and associate that user with the rest of their session with your site.

Logging In With a Passkey
But what about later when the session has expired and they come back ready to resume their account work? This is where the login functionality comes into play, and from a super high level, it’s much like the signup process. You send a request to the backend to generate a login challenge and use its response to request site credentials from the user’s browser/OS and then feed that back to the server to validate and upon validation, log them in, associating their user ID with the rest of their session.
First, to send the login challenge, it’s a simple GET request:
let response = await fetch('/backend-login-pre.php');
And on the backend, we use the WebAuthn library to create a credential request that looks like this:
   $domain = "lndo.site";
   $webauthn = new WebAuthn("Simple Passkey App", $domain);
   $args = $webauthn->getGetArgs();
   $_SESSION['challenge'] = ($webauthn->getChallenge())->getBinaryString();
   echo json_encode($args);
Then back on the frontend, we use our helper method to convert the data from bas64 to an array buffer and feed it into the browser’s get credential method:
   let data = await response.json();
   helper.bta(data);
   let credential = await navigator.credentials.get(data);
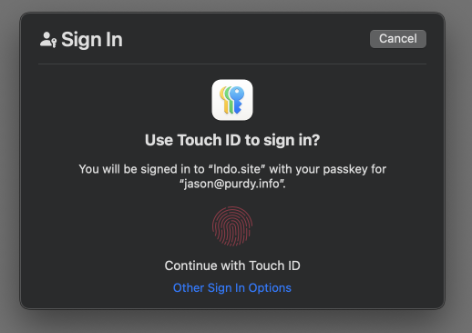
That call will trigger the interaction between the browser and the OS to retrieve the saved passkey, which looks something like this (Firefox on Mac):
The credential that comes back uses array buffers, so needs to be converted to base64 and then sent to the server for validation.
   let credential_data = {
     id: credential.rawId ? helper.atb(credential.rawId) : null,
     client: credential.response.clientDataJSON ? helper.atb(credential.response.clientDataJSON) : null,
     auth: credential.response.authenticatorData ? helper.atb(credential.response.authenticatorData) : null,
     sig: credential.response.signature ? helper.atb(credential.response.signature) : null,
     user: credential.response.userHandle ? helper.atb(credential.response.userHandle) : null
   };
   let form_data = new FormData();
   form_data.append('credential', JSON.stringify(credential_data));
   response = await fetch('/backend-login.php', {
     method: 'POST',
     body: form_data
   });
On the server side, the data comes in base64 encoded and needs to be decoded, which turns into binary. Some of those values can be passed directly into the WebAuthn library’s processGet method, but you can use bin2hex to convert the credential ID and userHandle into data that matches up with the initial signup request.
   $crendential_data = json_decode($_POST['credential'], true);
   $credential_id = bin2hex(base64_decode($crendential_data['id']));
   $unique_id = bin2hex(base64_decode($crendential_data['user']));
Now you can query your passkey table for a passkey that matches that credential_id and unique_id. Then you can call WebAuthn’s processGet method with other data from the request (the client, auth, and sig), the passkey (the public_key), and the challenge created from the previous step.
   // This is a database query that returns the matching row.
   $passkey = get_passkey($credential_id, $unique_id);
   $client = base64_decode($crendential_data['client']);
   $auth = base64_decode($crendential_data['auth']);
   $sig = base64_decode($crendential_data['sig']);
   $valid = $webauthn->processGet(
     $client,
     $auth,
     $sig,
     $passkey['public_key'],
     $_SESSION['challenge']
   );
If there was a matching passkey and if the processGet call returned true, then you have a valid authentication request and you can log in the user.
   if ($valid) {
     unset($_SESSION['challenge']);
     // Let's save the user id to the session, logging them in.
     $_SESSION['user_id'] = $passkey['user_id'];
     echo json_encode(['result' => 'success']);
   }
   else {
     echo json_encode(['result' => 'invalid']);
   }
Then on the client side, you can look at the response and if it was successful, redirect the user to the logged-in page, which can now rely on the user ID to personalize the page.
   data = await response.json();
   if (data.result == 'success') {
     window.location.href = '/dashboard.php';
   }
So there you go! This high-level overview will get you started and running. From there, you can delve deeper and customize to fit your specific requirements. I’ve published the complete code and working example on Github and if you have any questions, you can reach out to me via email or use the Q&A section in that Github repo.
IPC NEWSLETTER
All news about PHP and web development
In Conclusion
One of the strengths of this system is that it’s not susceptible to phishing attacks. Credentials are bound to the domain where they were created, so if the user ends up clicking on a malicious link that takes them to a site that looks similar to a legitimate site, any request for a passkey from the malicious site will not match up to the legitimate site’s passkey.
Unfortunately, while WebAuthn is widely available, its adoption has not taken off to be mainstream. While some sites have passkey support, they also run other login methods like OAuth and even the basic password. Passkeys are still a foreign concept to most users, but this is a great time to learn and adopt as a web developer to be prepared for when it hopefully becomes more mainstream. Once users see how easy it is to create an account and log in with WebAuthn, they will love going to sites that support it.